Securing your API endpoints is very important to prevent unauthorized access to your systems. But how do you do this efficiently? Are you going to build a user management system from scratch? Let me introduce you to Keycloak and how to integrate it with API Platform.
What is Keycloak?
Keycloak is an open source server for identity and access management. It has a lot of awesome features which saves us, developers, from building user management tooling and login and registration systems.
I’ll list a few of the key features of Keycloak:
- Single Sign On
Log in once and access multiple applications. - Social Login
Keycloak makes it very simple to log in using Google, Facebook, Twitter and many more providers. - SAML, OIDC (OpenID Connect) and OAuth 2 support
Keycloak being built on these authorization and authentication standards makes it very easy to integrate Keycloak in your applications. - Account management portal
The built in account management portal makes it fast and easy for your users to change their password or set up two factor authentication.
For the complete list of features check out https://www.keycloak.org/docs/latest/server_admin/.
Why use Keycloak with API Platform?
Now why would we want to use Keycloak with API Platform? Good question.
First of all, it saves us a lot of time, since we won’t have to worry about user management. Secondly, Keycloak is open source and built on top of a lot of standards for user management and identity brokering. It’s fully customizable, you can change the look and feel using custom themes for Keycloak. It’s very easy to set up – just run the docker container with a few parameters and you’re done!
This makes it the perfect candidate to use Keycloak with API Platform when you want to build something that requires your users to sign up.
Let’s start by installing and configuring Keycloak.
Configure Keycloak
Let’s add Keycloak to our development environment using the provided docker-compose.yml files of the API Platform distribution.
version: "3.4"
services:
# Removed the default services for brevity
keycloak_db:
image: mariadb:latest
environment:
- MARIADB_ROOT_PASSWORD=YOURROOTPASSWORD
- MARIADB_DATABASE=keycloak
volumes:
- keycloak_db_data:/var/lib/mysql:rw
keycloak:
image: quay.io/keycloak/keycloak:latest
ports:
- target: 8080
published: 8080
protocol: tcp
- target: 8443
published: 8443
protocol: tcp
environment:
DB_VENDOR: mariadb
DB_ADDR: keycloak_db
DB_DATABASE: keycloak
DB_USER: root
DB_PASSWORD: YOURROOTPASSWORD
KEYCLOAK_USER: admin
KEYCLOAK_PASSWORD: YOURKEYCLOAKADMINPASSWORD
PROXY_ADDRESS_FORWARDING: "true"
depends_on:
- keycloak_db
volumes:
php_socket:
caddy_data:
caddy_config:
keycloak_db_data:
db_data:
Code language: YAML (yaml)We’ve added 2 services. An extra instance of a database service for Keycloak, in our case MariaDB, and a service for Keycloak itself. We’ve configured Keycloak to connect to the database we’ve added previously.
Now when you run docker-compose up it should create the necessary containers and Keycloak should start.
Creating a realm
After confirming Keycloak is running you can navigate to http://localhost:8080 and you should be greeted by this screen.
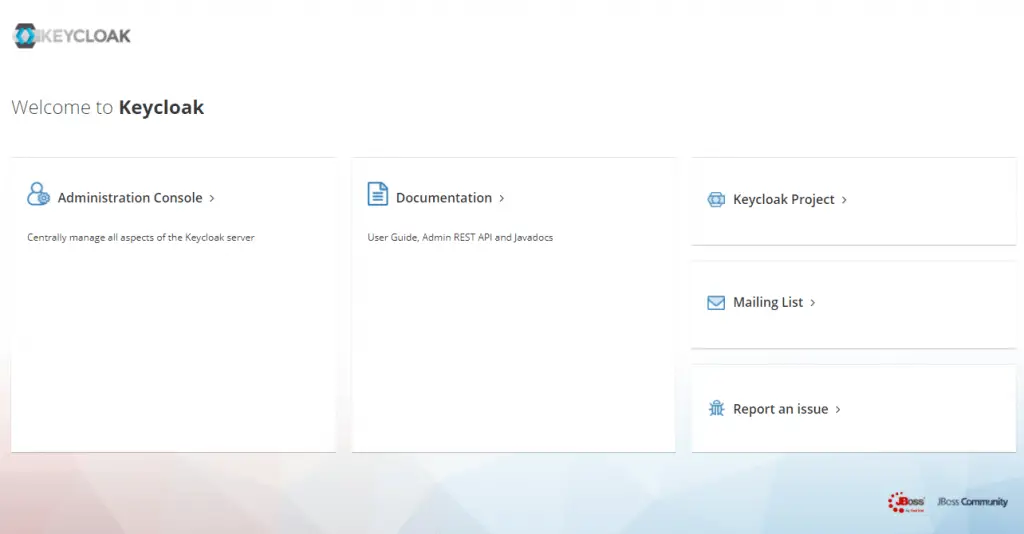
Click on ‘Administration Console’ and login using admin and the password you specified in the docker-compose.yaml file.
Now you should see the following screen.
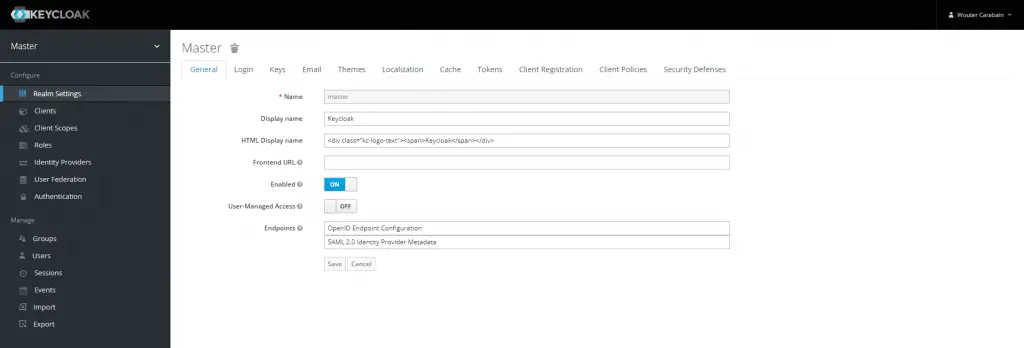
Hover over the word ‘Master’ in the menu and click the ‘Add realm’ button that appears.
A realm manages a set of users, credentials, roles, and groups. A user belongs to and logs into a realm. Realms are isolated from one another and can only manage and authenticate the users that they control.
https://www.keycloak.org/docs/latest/server_admin/
Give your realm a name and click on ‘Create’. Congratulations, you’ve created your first realm in Keycloak!
Now you have the possibility to enable or disable user registration and much more. Check out the different tabs on the page.
Creating a client
Now we need to create a client for our webapp. I say for our webapp, because that’s where the user gets redirected to Keycloak if they aren’t logged in yet. Keycloak then issues an Access Token which we’ll need to validate in our API.
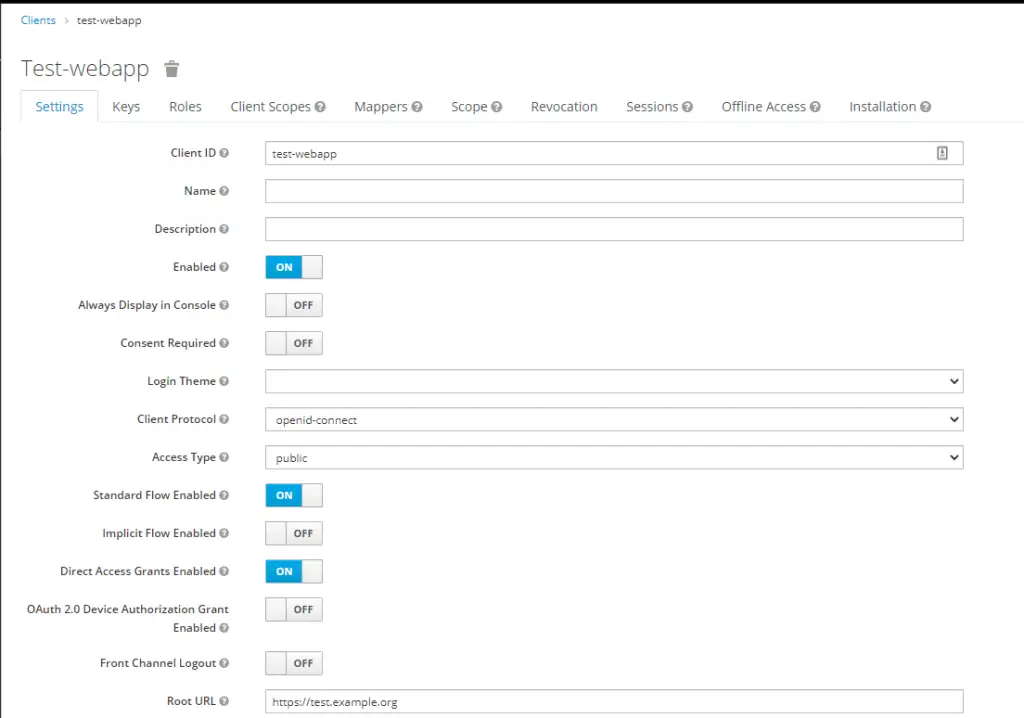
So let’s create the client. First click on ‘Clients’ in the menu. Then on the right side of the table header is a ‘Create’ button. Click it and you’ll see the form to add a client.

Enter a descriptive Client ID, this will be the client_id your webapp will use, and leave the Client Protocol on openid-connect. Enter the URL to your webapp in the Root URL field.
You will be presented with a large form with a lot of settings. We won’t need to change them for this use case. Just leave them on the default settings.
Creating our first user
Now let’s create our first user for the webapp. Click in the menu on ‘Users’ and in the table heading there should be a button ‘Add user’.
This brings you to the following form.
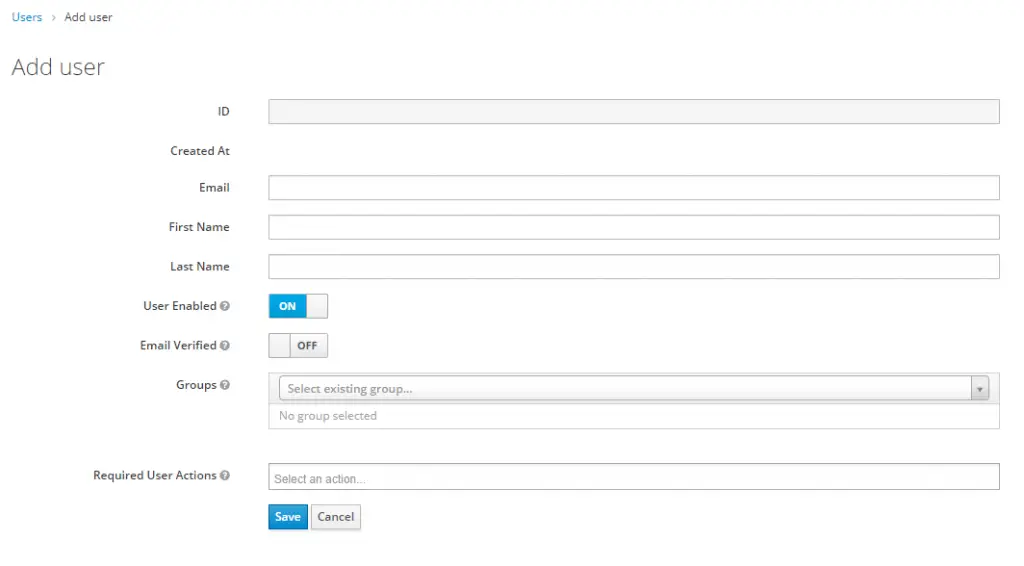
Enter the required fields. Depending on your realm settings on the ‘Login’ tab you’ll need to provide a username. After entering the details, click ‘Save’. This will take you to the Edit user screen.
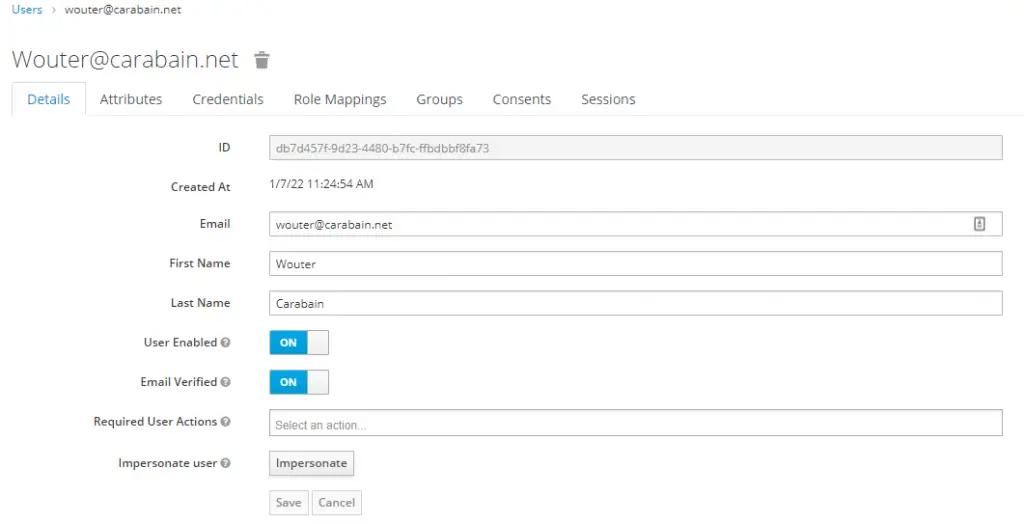
Before we can log in using this account we’ll need to create some credentials, so click on the ‘Credentials’ tab.
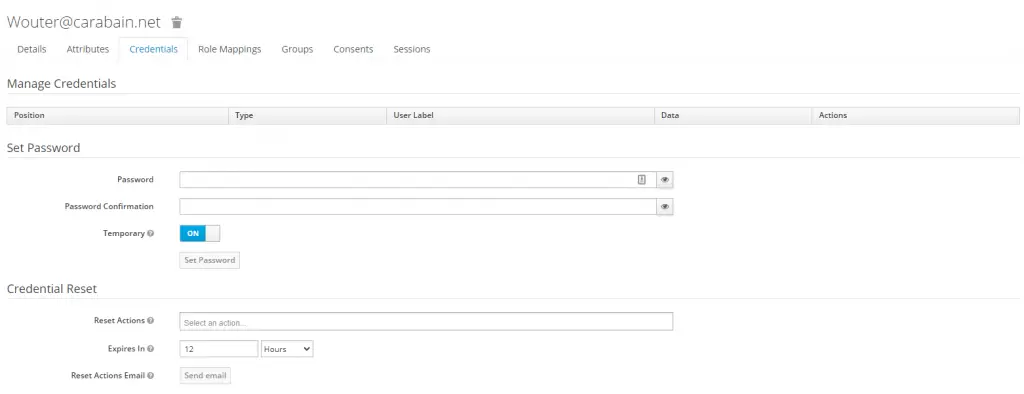
This is where you can set a password for this user. When you leave ‘Temporary’ set to ‘On’ the user will need to change his password after logging in.
Configure API Platform
Now it’s time to tell API Platform and Symfony it’s alright to accept the JWT tokens created by our Keycloak instance. Because our API links a lot of stuff to a user entity we’ll create a very simple user entity.
namespace App\Entity;

use App\Repository\UserRepository;
use Doctrine\ORM\Mapping as ORM;
use Ramsey\Uuid\Doctrine\UuidType;
use Symfony\Component\Security\Core\User\UserInterface;

#[ORM\Entity(repositoryClass: UserRepository::class)]
class User implements UserInterface
{
    #[ORM\Id]
    #[ORM\Column(type: UuidType::NAME)]
    private string $id;

    /**
     * @param string $id
     */
    public function __construct(string $id)
    {
        $this->id = $id;
    }

    /**
     * @return string
     */
    public function getId(): string
    {
        return $this->id;
    }

    /**
     * @param string $id
     *
     * @return User
     */
    public function setId(string $id): User
    {
        $this->id = $id;

        return $this;
    }

    /**
     * @return array|string[]
     */
    public function getRoles(): array
    {
        return ['ROLE_USER'];
    }

    /**
     * @return void
     */
    public function eraseCredentials()
    {
        return;
    }

    /**
     * @return string
     */
    public function getUserIdentifier(): string
    {
        return $this->getId();
    }
}

Code language: PHP (php)
Of course you can store extra data in this User entity, that’s up to you. The id of this entity will be the same as the id of the user in Keycloak. This makes managing users a lot easier.
Create the authenticator
Now let’s create a custom Authenticator for Symfony. This authenticator will take our JWT and checks its validity and provides the Security component of Symfony with the correct User entity.
For validating and parsing the JWT token we’ll make use of a library called Firebase JWT. So let’s install it using composer.
composer require firebase/php-jwt
Code language: Bash (bash)
Now we’re ready to create our custom Authenticator in the src/Security folder. I’ll call the file KeycloakAuthenticator.php.
namespace App\Security;

use App\Entity\User;
use App\Repository\UserRepository;
use Doctrine\ORM\EntityManagerInterface;
use Exception;
use Firebase\JWT\JWK;
use Firebase\JWT\JWT;
use Symfony\Component\DependencyInjection\ParameterBag\ParameterBagInterface;
use Symfony\Component\HttpFoundation\JsonResponse;
use Symfony\Component\HttpFoundation\Request;
use Symfony\Component\HttpFoundation\Response;
use Symfony\Component\Security\Core\Authentication\Token\TokenInterface;
use Symfony\Component\Security\Core\Exception\AuthenticationException;
use Symfony\Component\Security\Http\Authenticator\AbstractAuthenticator;
use Symfony\Component\Security\Http\Authenticator\Passport\Badge\UserBadge;
use Symfony\Component\Security\Http\Authenticator\Passport\Passport;
use Symfony\Component\Security\Http\Authenticator\Passport\SelfValidatingPassport;
use Symfony\Contracts\Cache\ItemInterface;
use Symfony\Contracts\Cache\TagAwareCacheInterface;

class KeycloakAuthenticator extends AbstractAuthenticator
{
    public function __construct(
        private EntityManagerInterface $entityManager,
        private ParameterBagInterface $parameterBag,
        private TagAwareCacheInterface $cacheApp,
        private UserRepository $userRepository
    ) {}

    /**
     * Called on every request to decide if this authenticator should be
     * used for the request. Returning `false` will cause this authenticator
     * to be skipped.
     */
    public function supports(Request $request): ?bool
    {
        return $request->headers->has('Authorization');
    }

    /**
     * @param Request $request
     *
     * @return Passport
     */
    public function authenticate(Request $request): Passport
    {
        // Get token from header
        $jwtToken = $request->headers->get('Authorization');
        if (false === str_starts_with($jwtToken, 'Bearer ')) {
            throw new AuthenticationException('Invalid token');
        }

        $jwtToken = str_replace('Bearer ', '', $jwtToken);

        // Decode the token
        $parts = explode('.', $jwtToken);
        if (count($parts) !== 3) {
            throw new AuthenticationException('Invalid token');
        }

        $header = json_decode(base64_decode($parts[0]), true);

        // Validate token
        try {
            $decodedToken = JWT::decode($jwtToken, $this->getJwks(), [$header['alg']]);
        } catch (Exception $e) {
            throw new AuthenticationException($e->getMessage());
        }

        return new SelfValidatingPassport(
            new UserBadge($decodedToken->sub, function (string $userId) {
                $user = $this->userRepository->find($userId);
                if (null === $user) {
                    $user = new User($userId);
                    $this->entityManager->persist($user);
                    $this->entityManager->flush();
                }

                return $user;
            })
        );;
    }

    /**
     * @param Request $request
     * @param TokenInterface $token
     * @param string $firewallName
     *
     * @return Response|null
     */
    public function onAuthenticationSuccess(Request $request, TokenInterface $token, string $firewallName): ?Response
    {
        // on success, let the request continue
        return null;
    }

    /**
     * @param Request $request
     * @param AuthenticationException $exception
     *
     * @return Response|null
     */
    public function onAuthenticationFailure(Request $request, AuthenticationException $exception): ?Response
    {
        $data = [
            'error' => strtr($exception->getMessageKey(), $exception->getMessageData())
        ];

        return new JsonResponse($data, Response::HTTP_UNAUTHORIZED);
    }

    /**
     * @return array
     */
    private function getJwks(): array
    {
        $jwkData = $this->cacheApp->get('jwk_keys', function(ItemInterface $item) {
            $jwkData = json_decode(
                file_get_contents(sprintf(
                    '%s/realms/%s/protocol/openid-connect/certs',
                    trim($this->parameterBag->get('keycloak_url'), '/'),
                    $this->parameterBag->get('keycloak_realm')
                )),
                true
            );

            $item->expiresAfter(3600);
            $item->tag(['authentication']);

            return $jwkData;
        });

        return JWK::parseKeySet($jwkData);
    }
}

Code language: PHP (php)
First the authentication System calls the supports method which will check if the request contains an Authorization header. If not, our custom authenticator will be skipped.
The authenticate method is where the “magic” happens. First we’ll perform some sanity checks to see if we really got a JWT in the Authorization header. If not we’ll throw an exception.
Then we’ll use the Firebase JWT library to validate our token using the JWKs provided by Keycloak. For this we’ll need to fetch the JWKs from Keycloak using the url provided by Keycloak. Because the JWKs don’t change frequently, we’ll cache them in the cache.app pool for one hour. This is implemented in the getJwks method.
A JSON Web Key (JWK) is a JavaScript Object Notation (JSON) data structure that represents a cryptographic key.
https://self-issued.info/docs/draft-ietf-jose-json-web-key.html
After confirming that the JWT is valid, we’ll return a SelfValidatingPassport because we don’t need to validate the credentials of the user. All of the validation is done at this point. The UserBadge in this passport received a function which will provide the User entity to the Security component of Symfony. We’ll check if the user with the Keycloak id already exists, if not we’ll create the entity and return it.
We’ve used the parameter bag of the container to access keycloak_url and keycloak_realm to create the URL needed to get the JWKs. Let’s add those parameters to the container.
Create config/packages/keycloak.yaml with the following content.
parameters:
    keycloak_realm: '%env(resolve:KEYCLOAK_REALM)%'
    keycloak_url: '%env(resolve:KEYCLOAK_URL)%'
Code language: YAML (yaml)
Now add KEYCLOAK_REALM and KEYCLOAK_URL to your .env file to set the actual values.
KEYCLOAK_REALM=test_realm
KEYCLOAK_URL=http://localhost:8080
Code language: Bash (bash)
Our custom authenticator is now correctly configured and ready to be used!
Configuring Symfony security
Now it’s time to set up the Security component of Symfony. This can be done fairly easily by adding a few lines to config/packages/security.yaml.
security:
    enable_authenticator_manager: true

    firewalls:
        dev:
            pattern: ^/(_(profiler|wdt)|css|images|js)/
            security: false

        main:
            lazy: true
            custom_authenticators:
                - App\Security\KeycloakAuthenticator

    access_control:
        - { path: ^/docs, roles: IS_AUTHENTICATED_ANONYMOUSLY }}
        - { path: ^/, roles: ROLE_USER }
Code language: YAML (yaml)
To make use of our custom authenticator we’ll need to add it to the main firewall by adding it to the custom_authenticators section.
Next we need to update our access_control section to make sure only people with a valid JWT will have access to our API.
Final thoughts
I hope this guide helped you in setting up API Platform to accept JWTs from Keycloak. As you’ve read it is pretty easy to set up a basic integration, but a lot more is possible with Keycloak and API Platform.

I’m comming here from time to time to learn something new and as it always turns out also useful. Thank you for your work!
I’m glad you find my content useful!
Hello
Thanks for the writeup that’s very helpful. I’m curious though do the tokens not need to be validated as outlined in https://symfonycasts.com/screencast/symfony-rest4/lexikjwt-authentication-bundle to prevent spoofing JWTs. It seems that the lexikjwt-authentication-bundle takes care of this.
Ed
Thanks for your comment!
To answer your question we are in fact validating the tokens using the JSON Web Keys provided by Keycloak.
In the file
KeycloakAuthenticator.phpwe fetch the JWK’s from Keycloak and use those to validate the signature of the token. That signature can only be created using the private key of Keycloak. That’s our way of validating the token.If anything changes in the data of the token the signature changes, thus the token will fail the validation check and the
JWT::decodecall will throw an exception.I hope this cleared things up for you.
hi Wouter
Thanks a lot for this walk through… was able to adapt it easily to my particular use case…
I’m wondering though how you deal with expiring tokens…
What’s your setup in Keycloak ?
Are you using the Refresh Token ?
Do you think it is up to the client that uses the API to make sure the JWT is still valid and refresh it regularly ?
I don’t think it would be a good idea to defer that responsibility to the API… but wondering what you think about it…
Last but not least…
The thing that keeps bothering me is that there is no “simple” way to assign an API-key to a user that would not expire… What are your thoughts on that ?
I the consuming service is a website, it is probably ok to require the client to make sure the JWT is still valid…
Yet, if the API is consumed by another server, a non changing API-key would seem more appropriate, don’t you think ?
Thanks in advance for your feedback
dGo
Thanks for your comment, I’m glad you found it useful and could adapt it for your use case!
I’m indeed using refresh tokens to get fresh access tokens for use in my applications. I use react-keycloak/web for my React applications which does the refreshing of almost expired tokens automatically. Which is pretty useful.
Yes, I think it’s up to the consumer of your API to make sure their token is still valid, because only the consumer can determine if a token is still necessary or can be discarded.
I don’t think it’s a good idea to use tokens that don’t expire, because that would basically be a password to your API and should be stored as such. The access- and refresh token mechanics are easily implemented for server to server communication. It’s pretty much the same as client <-> server communication using React for example. It’s just that the client is another server instead of a real user.
dag Wouter
dan zijn we het eens
super bedankt !
@dgoosens
Thanks for this great article!
Noticed that this part is a bit out-of-the-date
file_get_contents(sprintf(
‘%s/auth/realms/%s/protocol/openid-connect/certs’,
trim($this->parameterBag->get(‘keycloak_url’), ‘/’),
$this->parameterBag->get(‘keycloak_realm’)
)),
it should be
file_get_contents(sprintf(
‘%s/realms/%s/protocol/openid-connect/certs’,
trim($this->parameterBag->get(‘keycloak_url’), ‘/’),
$this->parameterBag->get(‘keycloak_realm’)
)),
so there is just extra `auth` in that URL.
Hi,
Thanks for the reply! I’ve changed it in the article!
Hi
Thanks for this handy tutorial.
Is it possible to authenticate the keycloak token without creating an entry in the user db?
Hi Alain,
Yes, this is possible. You’ll need to create a User class that implements the UserInterface of Symfony and have the KeycloakAuthenticator class return an instance of your User object. You can fill your User object using data that is present in the JWT.
Hopefully this helps you!